There are a few different options for cooling the wort.
Immersion and counterflow coolers are available or you could simply leave the brew to cool by itself. I prefer to force
cool the brew; doing so will allow more protein material to settle out of the brew, resulting in a clearer
brew. I use a counterflow cooler myself, here is a description of
the process.
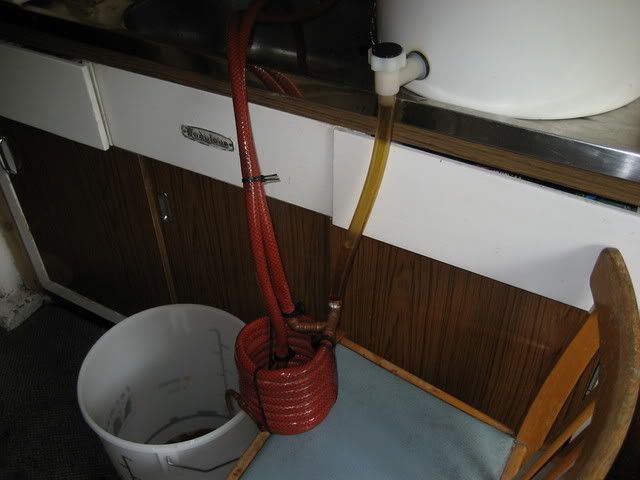
The above photo shows the cooler hosepipe connected to a cold
water supply and to the boiler with a piece of tight fitting tubing. Before I
connect the tubing to the boiler I fill a jugful of wort from the boiler, the first runnings are usually cloudy and returned
to the boiler, the hops form a filter bed in a similar way the grains do in the sparging stage.
I then turn on the cold water supply followed by the boiler tap;
this cools the wort down to a temperature in the region of 20c-25c, which is a safe temperature for adding the yeast.
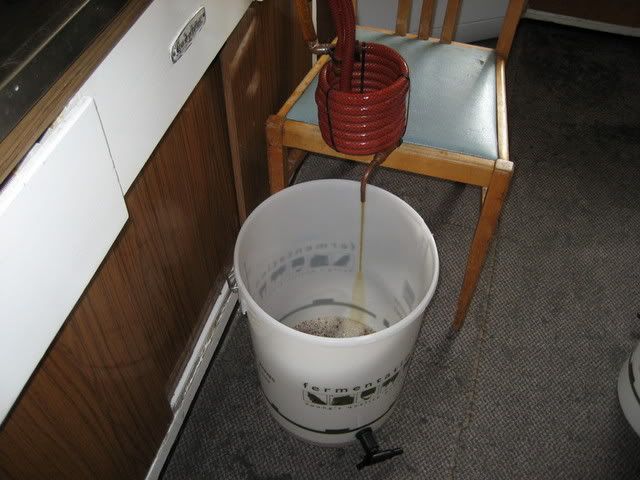
The above photo shows the cooled wort being collected in the fermenting bucket. I let the brew splash into the fermenting
bucket to allow aeration to take place, this is essential for allowing the yeast to grow when it is added to the wort.
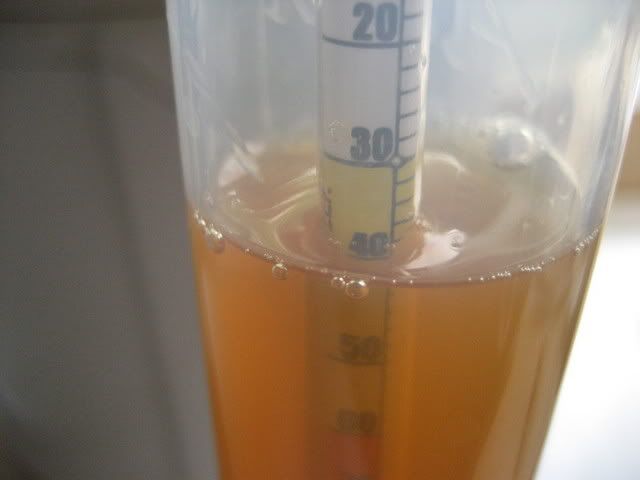
I take a hydrometer reading at this stage to determine the gravity
of the brew. I took a reading of 1040 at 25c. My hydrometer is calibrated at 20c and reads slightly low, after
the corrections were calculated the true gravity of the brew is 1043. As I aimed for 1044, I am only slightly out and
I am happy with this.
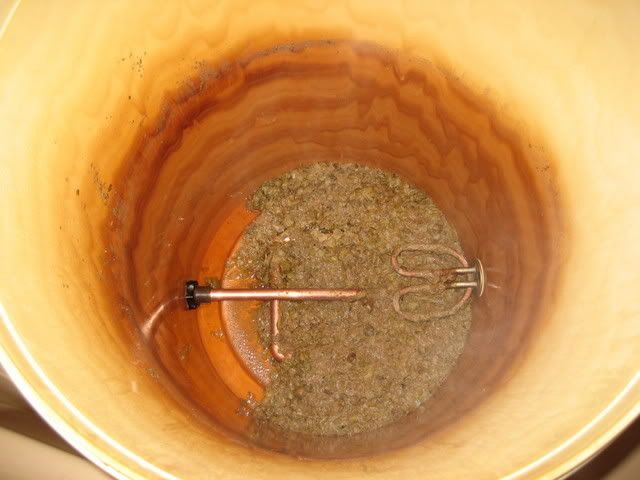
The above photo shows the hops in the boiler after the brew has
been cooled and transferred, if you look closely you will see the light brown coloured proteins left in the hops, as
I mentioned earlier the hops act as a filter bed and prevent this from going into the brew.
Please go to the next page, aerating.